> ## Documentation Index
> Fetch the complete documentation index at: https://docs.cadmus-cad.app/llms.txt
> Use this file to discover all available pages before exploring further.
# New CFS Form Fields Reference for Cadmus Dispatch CAD
> Complete field-by-field reference for the New Call for Service form — required fields, location modes, priority levels, and action buttons.
The **Create New Call for Service** form (opened with **F1** or **New CFS** in the header) collects the minimum information needed to create a dispatchable incident record. This page describes every field, mode, and button in the form so you can complete it accurately under time pressure. For the end-to-end workflow, see [Create a Call for Service](/dispatch/create-cfs).
## Required fields
These fields must be completed before Cadmus enables **Create Call**. In the form they are marked with a **red arrow** and **\*** (uses the theme error color so it stays readable in dark or light UI).
| Field | Label | Notes |
| ---------------- | ------------------------ | ----------------------------------------------------- |
| Incident type | **Incident Type \*** | Select from the list — do not rely on free text alone |
| Location | **Incident Location \*** | Street address, cross street, common place, or GPS |
| Incident details | **Incident Details \*** | Who, what, where, and any immediate risks |
**Reporting party is optional.** You can create the call with an empty RP section and add or edit the caller later in call detail.
## Priority levels
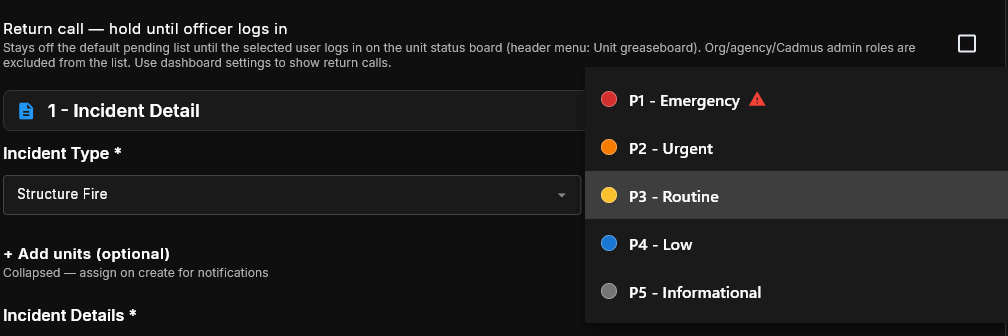
Select the **Priority Level \*** that matches your agency's response protocol. Priority drives queue order on the dispatch board and may trigger automated notifications. A default is always selected, so priority alone does not block **Create Call**.
Immediate life-safety threat. Requires the fastest available response.
Prompt response required. Situation is serious but not immediately life-threatening.
Standard response. No immediate threat to life or property.
Non-urgent. Can be queued for the next available unit.
Informational only — no dispatch response expected.
 ## Incident type
Click **Incident Type \*** and type 2–4 letters to filter the dropdown, then select the matching type. Incident type drives tags, default priority, and all downstream workflows (reporting templates, CAD exports, statistics).
## Incident type
Click **Incident Type \*** and type 2–4 letters to filter the dropdown, then select the matching type. Incident type drives tags, default priority, and all downstream workflows (reporting templates, CAD exports, statistics).
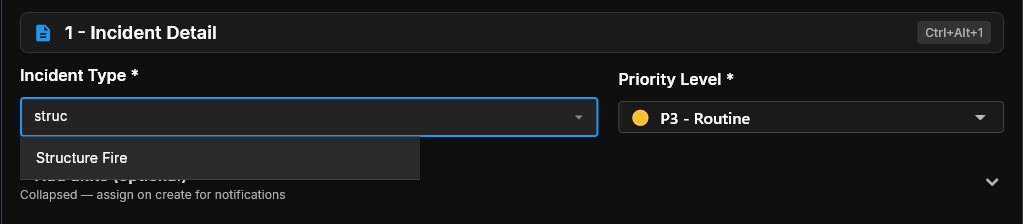 Always select from the list. Free-text entries without a structured type may cause missing data in agency reports and integrations.
## Location modes
The **Location \*** field accepts three input modes. Cadmus detects which mode you are using based on your entry.
Set the location dropdown to **Address**, then type a street number and name. Cadmus submits the address to your agency's configured GIS service. Address suggestions appear as you type.
When GIS confirms the address, a **Geo verified** badge appears beside the field. The map pin is placed automatically.
Always select from the list. Free-text entries without a structured type may cause missing data in agency reports and integrations.
## Location modes
The **Location \*** field accepts three input modes. Cadmus detects which mode you are using based on your entry.
Set the location dropdown to **Address**, then type a street number and name. Cadmus submits the address to your agency's configured GIS service. Address suggestions appear as you type.
When GIS confirms the address, a **Geo verified** badge appears beside the field. The map pin is placed automatically.
 If the address does not validate, the spinner stops without a Geo verified badge. Cadmus may still create the call, but the map pin could land in the wrong location. Verify the pin in call detail after creating the call.
Set the location dropdown to **Cross St**, then enter two intersecting street names (e.g., `Main St & Ash St`). Use this mode when no building address is available.
If the address does not validate, the spinner stops without a Geo verified badge. Cadmus may still create the call, but the map pin could land in the wrong location. Verify the pin in call detail after creating the call.
Set the location dropdown to **Cross St**, then enter two intersecting street names (e.g., `Main St & Ash St`). Use this mode when no building address is available.
 Update the location to a full address as soon as field units confirm the scene, so the record and any downstream reports reflect the exact location.
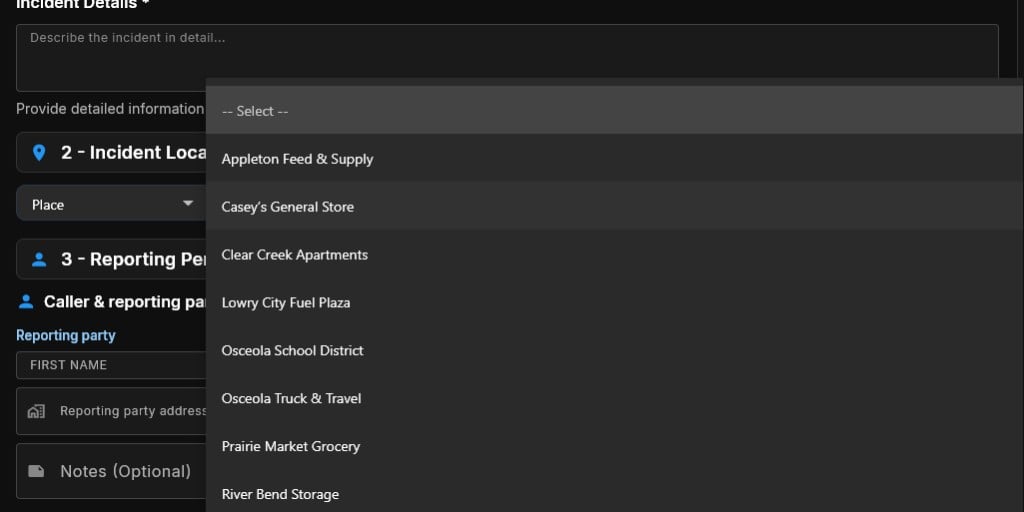
Set the location dropdown to **Place**, then select from your agency's configured common-place list — schools, stores, parks, and other frequently dispatched locations. Common places include pre-validated coordinates, so GIS lookup is not required.
Update the location to a full address as soon as field units confirm the scene, so the record and any downstream reports reflect the exact location.
Set the location dropdown to **Place**, then select from your agency's configured common-place list — schools, stores, parks, and other frequently dispatched locations. Common places include pre-validated coordinates, so GIS lookup is not required.
 ### Address validation behavior
While you type a street address, Cadmus contacts your agency's GIS service:
* A **Validating address…** spinner appears in or below the Location field.
* Follow any snackbar or inline error messages before submitting the form.
* Address validation rules are configured in **Web Admin → GIS Settings**. Contact your agency administrator if validation consistently fails for known addresses.
## Reporting party (optional)
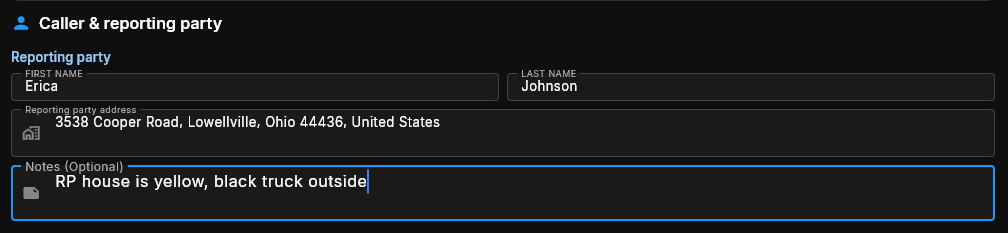
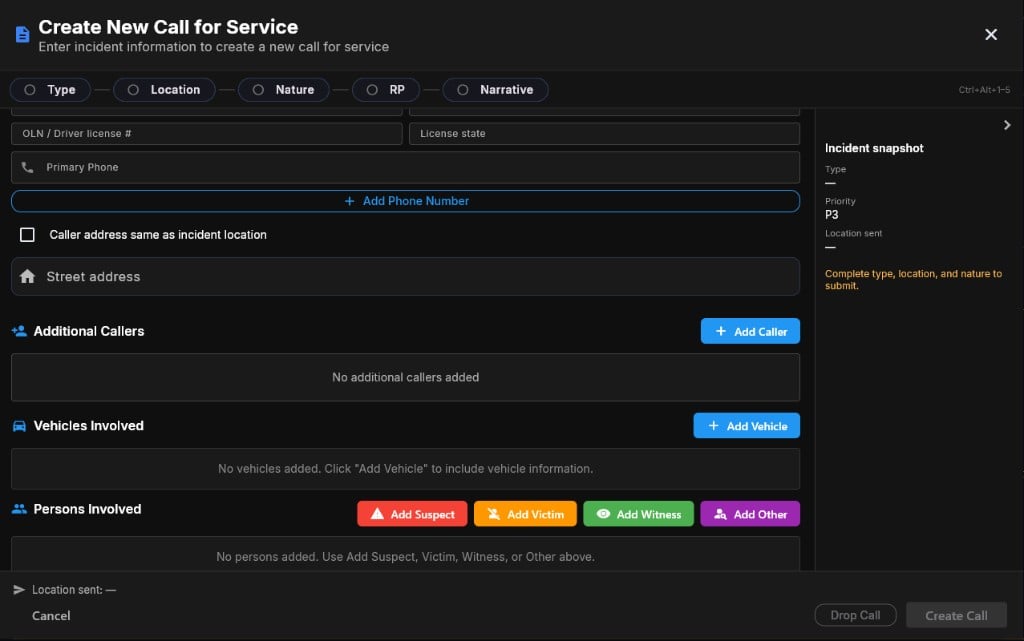
The reporting party (RP) section captures the caller's contact information when available. It is labeled **(optional)** in the form and **does not** block **Create Call**.
| Option | Description |
| -------------------------------------------- | ---------------------------------------------------------------------- |
| **Caller address same as incident location** | Toggle on to copy the incident location to the caller's address field. |
| **+ Add Phone Number** | Record additional callback numbers for the same caller. |
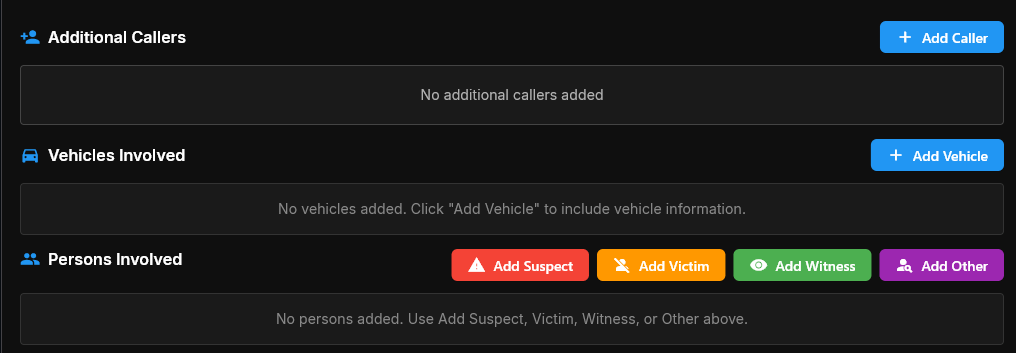
| **+ Add Caller** | Add a second or subsequent reporting party at create time. |
### Address validation behavior
While you type a street address, Cadmus contacts your agency's GIS service:
* A **Validating address…** spinner appears in or below the Location field.
* Follow any snackbar or inline error messages before submitting the form.
* Address validation rules are configured in **Web Admin → GIS Settings**. Contact your agency administrator if validation consistently fails for known addresses.
## Reporting party (optional)
The reporting party (RP) section captures the caller's contact information when available. It is labeled **(optional)** in the form and **does not** block **Create Call**.
| Option | Description |
| -------------------------------------------- | ---------------------------------------------------------------------- |
| **Caller address same as incident location** | Toggle on to copy the incident location to the caller's address field. |
| **+ Add Phone Number** | Record additional callback numbers for the same caller. |
| **+ Add Caller** | Add a second or subsequent reporting party at create time. |
 ## Additional options
| Option | Description |
| -------------------------- | ------------------------------------------------------------------------------------------------------------------------------------------------------------------------------------ |
| **Disable Timer** | Skips the default agency status timer for this call. Use only when agency policy permits. |
| **+ Add Vehicle** | Attach a vehicle record to the CFS at creation time (make, model, plate, color, state). |
| **+ Add units (optional)** | Assign units at create time; collapsed by default — expand to search and select units. Click outside the section (or the header again) to collapse it; selected units stay assigned. |
## Form action buttons
| Button | Effect |
| --------------- | ------------------------------------------------------------------------------- |
| **Create Call** | Validates all required fields, saves the CFS, and opens it in call detail. |
| **Drop Call** | Discards all entered data without saving. Cadmus may prompt you to confirm. |
| **Done** | Closes the dialog after a call has been saved. |
| **Append note** | Adds a narrative note to an already-saved call without reopening the full form. |
**Drop Call** permanently discards everything entered in the current session of the form. Use it only when you intentionally want to cancel the new call.
## Tips
Images and attachments are not available during the initial create dialog. After the call is saved, open it in call detail and use **Add Image** in the History / Logs section.
If you are unsure of the exact incident type, use a general category (e.g., "Disturbance") and update **Edit Incident Type** in call detail once more information is available.
## Related guides
End-to-end walkthrough for creating a new Call for Service.
Everything on the call detail page after the call is created.
## Additional options
| Option | Description |
| -------------------------- | ------------------------------------------------------------------------------------------------------------------------------------------------------------------------------------ |
| **Disable Timer** | Skips the default agency status timer for this call. Use only when agency policy permits. |
| **+ Add Vehicle** | Attach a vehicle record to the CFS at creation time (make, model, plate, color, state). |
| **+ Add units (optional)** | Assign units at create time; collapsed by default — expand to search and select units. Click outside the section (or the header again) to collapse it; selected units stay assigned. |
## Form action buttons
| Button | Effect |
| --------------- | ------------------------------------------------------------------------------- |
| **Create Call** | Validates all required fields, saves the CFS, and opens it in call detail. |
| **Drop Call** | Discards all entered data without saving. Cadmus may prompt you to confirm. |
| **Done** | Closes the dialog after a call has been saved. |
| **Append note** | Adds a narrative note to an already-saved call without reopening the full form. |
**Drop Call** permanently discards everything entered in the current session of the form. Use it only when you intentionally want to cancel the new call.
## Tips
Images and attachments are not available during the initial create dialog. After the call is saved, open it in call detail and use **Add Image** in the History / Logs section.
If you are unsure of the exact incident type, use a general category (e.g., "Disturbance") and update **Edit Incident Type** in call detail once more information is available.
## Related guides
End-to-end walkthrough for creating a new Call for Service.
Everything on the call detail page after the call is created.