Create CFS from a simulated 911 call
Use this only in a sandbox organization with Sandbox Realism running (header shows SANDBOX MODE, then start Realism from the sandbox badge). Create CFS this way only for a simulated call from the session that is running now. A call from an earlier session, or a live 911 call, still uses the local gateway.Generate a wireless 911 call
Choose Create CFS
Create the call
Create from a RapidSOS map alert
When a RapidSOS pin appears on the map, click it and choose Create New CFS. Cadmus opens Import RapidSOS Alert — a slim CFS form with location, caller, and supplemental notes already filled from the alert. You still must pick an Incident Type before Create Call is enabled.Import RapidSOS CFS
Create a new CFS

Dispatch header in sandbox — New CFS (F1) opens the create dialog. Confirm SANDBOX MODE or LIVE MODE before every session.
Open the New CFS form
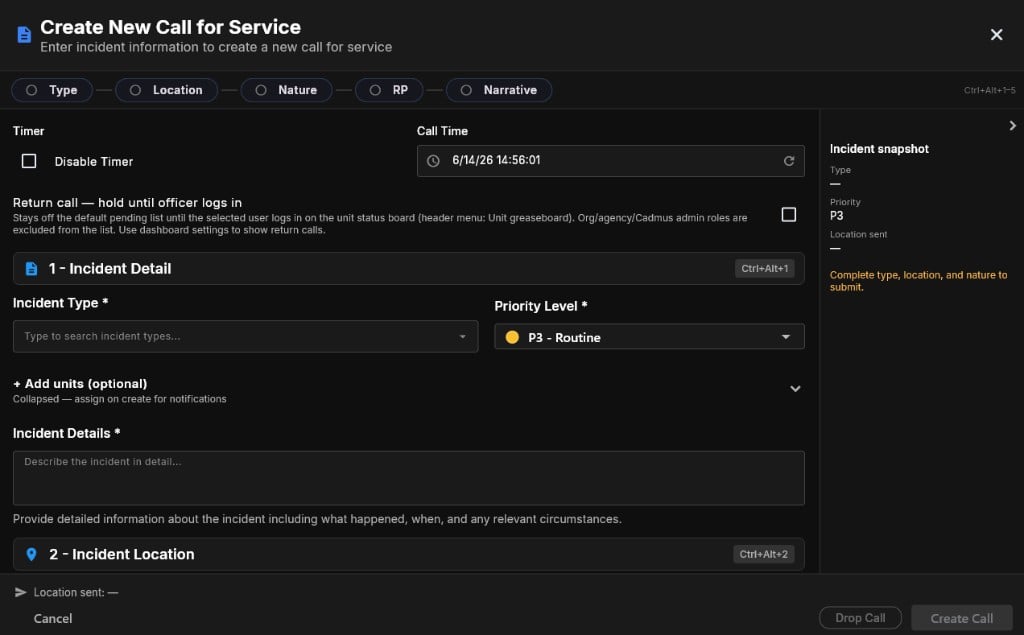
New CFS dialog on section 1 — Incident Detail. Required fields must be completed before Create Call is enabled.
Select an Incident Type
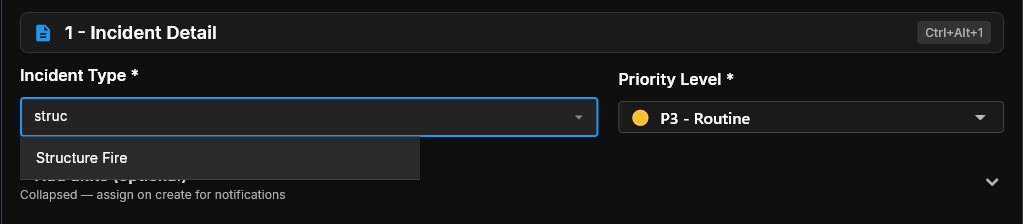
Type a few letters to filter incident types, then pick from the dropdown (e.g. Structure Fire).
Enter a Location
- Address — type a street number and name; address suggestions appear as you type. A Geo verified badge confirms GIS validation.
- Cross St — use two intersecting street names when no exact address is known (e.g.,
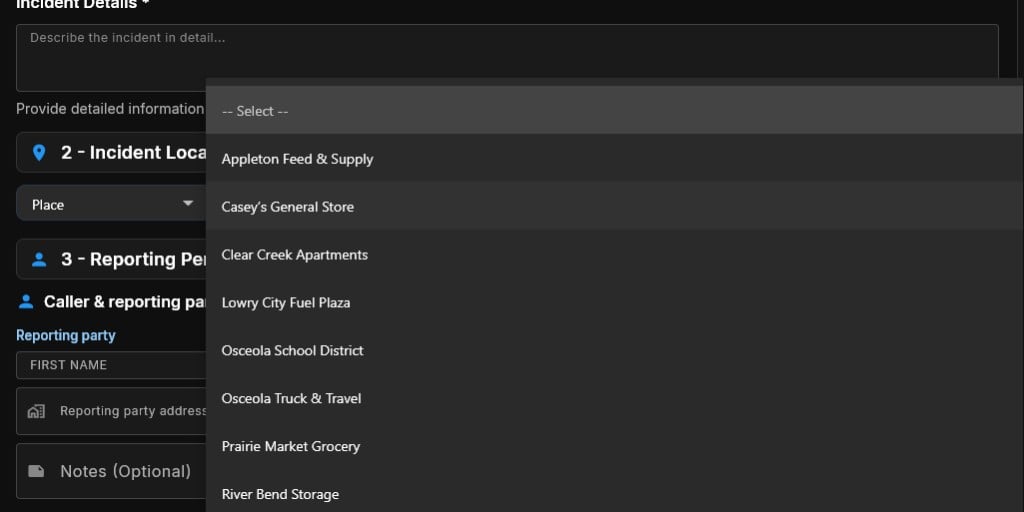
Main St & Ash St). - Place — select from your agency’s configured common-place list (schools, stores, landmarks).
- Street address
- Cross street
- Common place

Address mode with suggestions and Geo verified badge after GIS confirms the location.

Fill in Incident Details
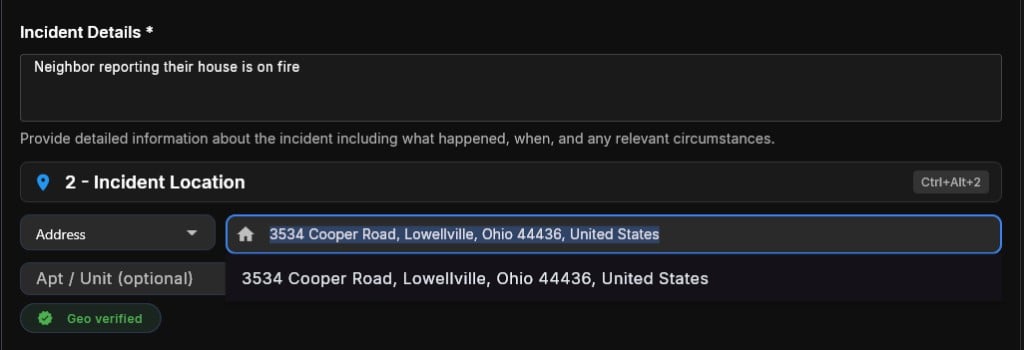
Incident Details with a sample narrative. Keep it factual and actionable for responding units.
Add Reporting Party information (optional)
- Toggle Caller address same as incident location when the caller is at the scene.
- Click + Add Phone Number to record additional callback numbers.
- Click + Add Caller under Additional Callers for a secondary reporting party.
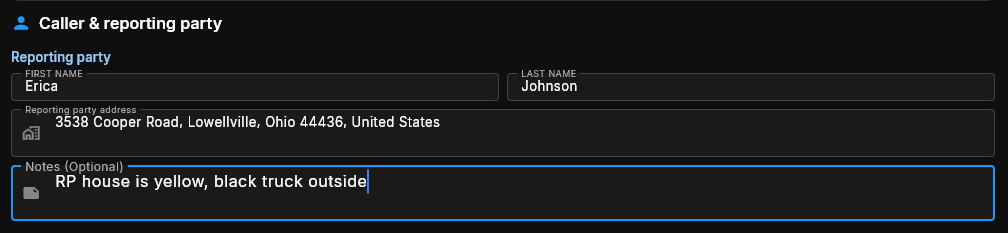
Optional reporting party name, address, and notes for the primary caller.
Set the Priority Level
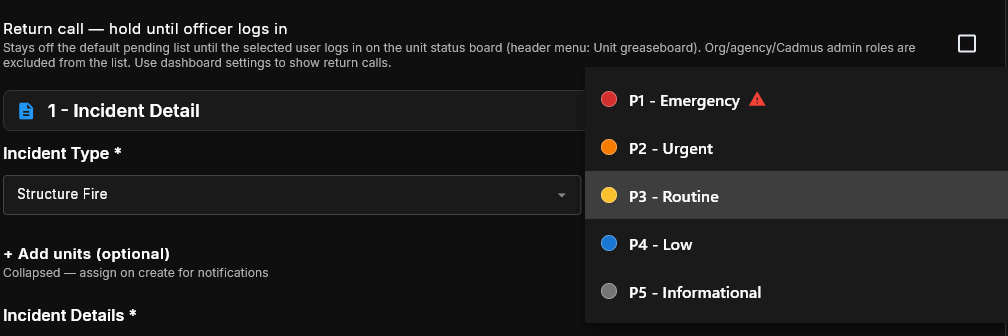
Priority dropdown — color-coded P1 through P5. P1 shows a warning icon for emergency incidents.
Review optional fields and click Create Call
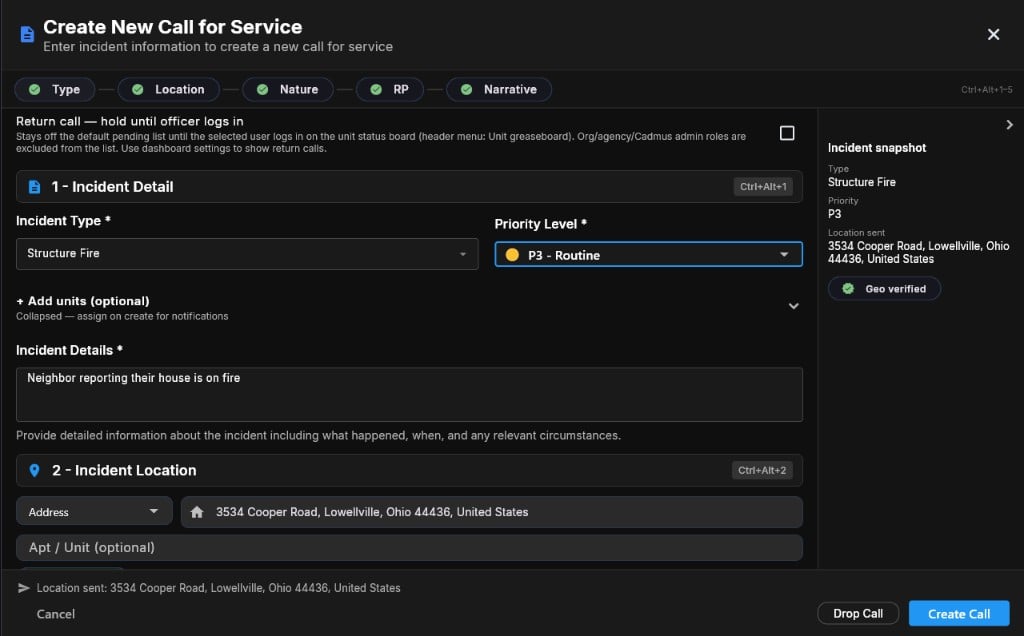
Completed form — section pills show green checkmarks, Incident snapshot lists type, priority, and geo-verified location, and Create Call is enabled.
After creating the call
Once the CFS is created, the call detail view opens automatically.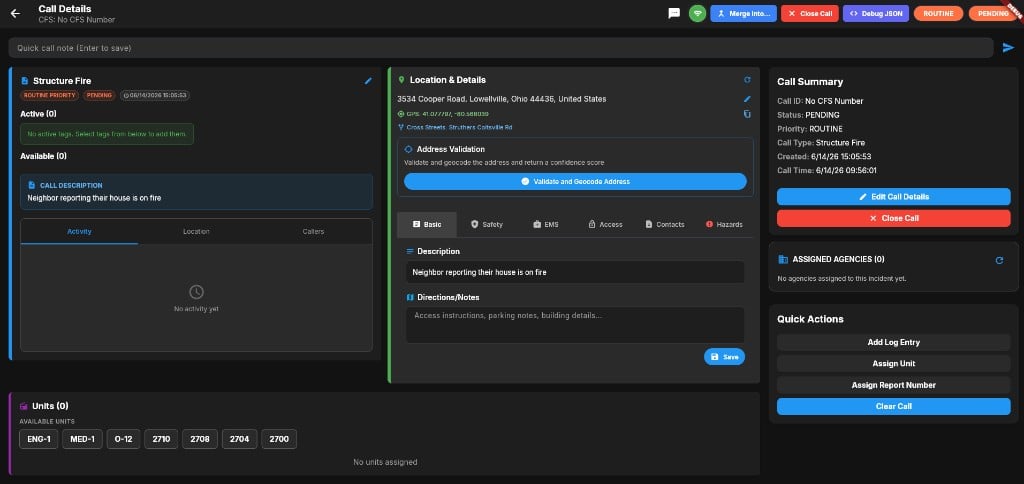
Call detail after Create Call — incident type, location, narrative, and Assign Unit quick actions.
- Assign available units using the AVAILABLE UNITS quick-assign row or Assign Unit.
- Add log entries with Add Log Entry or the quick note field.
- Add images or PDFs in the History & Logs section using the gallery, upload, or clipboard icons (JPEG/PNG/GIF/PDF; max 10 MB).
- Edit call information using Edit Call Details in the call summary block.